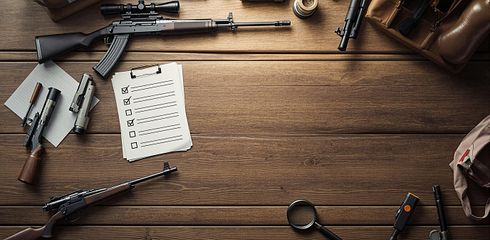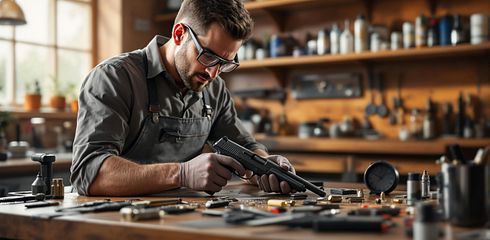
For gun owners and shooting sports enthusiasts, regular maintenance and cleaning of their equipment is essential. The AR-15, one of the most well-known and versatile semi-automatic rifles, requires regular maintenance to ensure functionality and longevity. This article provides a transformative step-by-step guide to disassembling and reassembling the AR-15, based on proven methods and practical tips.
Why is a Field Strip Important?
A field strip, or the basic disassembly of a firearm, is crucial for cleaning, inspection, and maintenance. It allows you to check important components of the firearm for wear or damage and ensures that dirt, carbon deposits, or other residues are removed. A well-maintained AR-15 is not only more reliable but also safer to handle.
This guide focuses on the direct gas impingement variant of the AR-15 – one of the most commonly used versions. While details may vary slightly with other models, such as the gas piston variant, the basic process remains similar.
Preparation: Safety Check Before Disassembly
Before you begin disassembly, the most important step is to perform a safety check on the firearm. Follow these steps:
- Remove the magazine: Take out the magazine and set it aside.
- Check the chamber: Pull back the charging handle and visually inspect the chamber to ensure no rounds remain in the rifle.
- Set the safety lever: Ensure that the safety lever is in the "SAFE" position to prevent accidental discharge.
Step-by-Step Guide to Disassembling the AR-15
1. Separating the Upper and Lower Receivers
The AR-15 receiver consists of two main parts: the Upper Receiver and the Lower Receiver.
- Locate the two cross pins on the Lower Receiver: the front pivot pin and the rear takedown pin.
- Gently push the rear takedown pin out with your thumb or a tool until it protrudes on the other side.
- Repeat the process for the front pivot pin and separate the two receiver halves.
2. Disassembling the Upper Receiver
The Upper Receiver contains the charging handle, the bolt carrier group (BCG), and other important components.
-
Removing the bolt carrier group (BCG):
- Pull back the charging handle and grasp the bolt carrier group.
- Slowly pull the BCG out of the receiver and set it aside.
-
Removing the charging handle:
- Pull the charging handle to the rear position and lift it slightly to disengage it from the rails.
-
Disassembling the bolt carrier group (BCG):
- Remove the retaining pin for the firing pin.
- Pull out the firing pin.
- Rotate the cam pin 90° and remove it to free the bolt.
- Pull the bolt out of the BCG.
Optionally, other parts of the bolt, such as the extractor, can be disassembled, but they require special tools and are not necessary for a field strip.
3. Disassembling the Lower Receiver
The Lower Receiver contains the trigger assembly, buffer, and buffer spring.
-
Removing the buffer and buffer spring:
- Press down on the buffer retaining pin to release the buffer and spring.
- Carefully pull both components out.
-
Inspecting the trigger assembly:
- Check the trigger assembly for cracks or irregularities. However, a complete disassembly is not necessary for basic cleaning.
Reassembling the AR-15
To reassemble the AR-15, follow the steps of disassembly in reverse order:
-
Assembling the bolt carrier group (BCG):
- Insert the bolt into the BCG and align it correctly.
- Reinsert the cam pin and rotate it back to its original position.
- Insert the firing pin and secure it with the retaining pin.
-
Inserting the charging handle and BCG into the Upper Receiver:
- Insert the charging handle into the rails.
- Insert the BCG into the Upper Receiver and push it forward.
-
Inserting the buffer and spring into the Lower Receiver:
- Position the spring and buffer in the appropriate opening and press them until they snap behind the retaining pin.
-
Connecting the two receiver halves:
- Close the Upper and Lower Receiver and secure them with the cross pins.
Function Test
After reassembly, a function test is crucial:
- Check the trigger: Pull the weapon back and test the trigger and reset.
- Check the loading and unloading process: Insert an empty magazine, pull back the charging handle, and check if the bolt remains open.
Important Notes and Tips
- Regularity: Clean your AR-15 after each use, especially after intense shooting sessions.
- Tools: A simple set of pins, an Allen wrench, and cleaning cloths are sufficient for basic maintenance.
- Inspection: Look for signs of wear or damage, especially on the BCG and trigger assembly.
Key Takeaways
- Safety check first: Ensure the firearm is completely unloaded before starting disassembly.
- Step-by-step approach: Disassemble the AR-15 systematically to avoid damaging or losing parts.
- Regular maintenance: A clean and well-maintained mechanism ensures reliable performance.
- Function test after reassembly: Check all essential functions before using the firearm.
- Basic tools: Small tools like an Allen wrench or a buffer help with difficult parts of disassembly.
Disassembling and maintaining your AR-15 doesn't have to be a complicated task. With the right technique and a methodical approach, you can optimally care for your firearm and extend its lifespan. Stay safe and enjoy the precision of your AR-15 on your next outing!
Source: "AR-15 (Direct Impingement) [Field Strip]: Disassembly & Reassembly" - Guncademy by Pew Pew Tactical, YouTube, Aug 30, 2025 - https://www.youtube.com/watch?v=zWx08GL8rD0
Use: Embedded for reference. Brief quotes used for commentary/review.