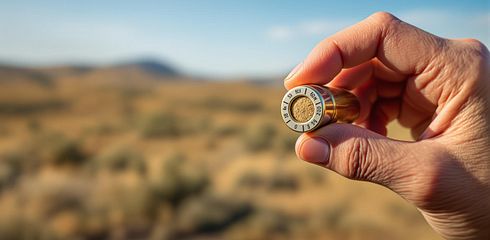
A distance meter only provides precise results when it is regularly calibrated. Without calibration, measurement errors can occur that impair target accuracy. Particularly hunters and sport shooters in Germany benefit from correct calibration to comply with legal requirements and work precisely.
Key Points:
- Why calibrate? Mechanical shocks, temperature fluctuations, and sensor deviations can reduce accuracy.
- When to calibrate? At least once a year or after shocks and temperature fluctuations.
- How to calibrate? Using a reference distance, certified measuring tape, and a stable tripod.
- Safety measures: Never look directly into the laser beam and secure the work area.
This article will guide you step by step on how to calibrate your distance meter, what tools you need, and how to avoid common mistakes.
How to Calibrate a Laser Distance Meter | Engineer Supply
Requirements and Preparation
Thorough preparation is the foundation for precise calibration. Here you will learn what tools are necessary, what safety precautions you need to consider, and how to set up a reliable reference distance.
Required Tools and Materials
For accurate calibration, you should use a metric steel measuring tape of class I or II to ensure accuracy according to German standards. A stable tripod is also essential, as it prevents movement during measurements.
Keep the calibration certificate ready, which documents the testing of your DISTO laser device. If the certificate is not available, the information in the user manual may be helpful. Choose a room with a constant temperature and as little air movement as possible to optimize measurement conditions.
Safety Guidelines
When working with laser distance meters, caution is required. Never look directly into the laser beam, as even weak beams can damage your eyes. Ensure that there are no reflective surfaces nearby that could deflect the beam. Secure the work area against unauthorized access and inform others about the ongoing calibration work. Turn off the device before starting preparations and check the surroundings for potential hazards.
Setting Up a Reference Baseline
Selecting the reference distance is a central step for successful calibration. Choose a straight, unobstructed distance between two fixed points, ideally between 1 and 10 meters. Measure the distance with your certified steel measuring tape by stretching it tight and horizontally.
Position your distance meter exactly along the reference distance and use a tripod to ensure maximum stability. Perform at least 10 individual measurements from the same point. The average obtained will help you identify systematic errors and verify accuracy.
These preparatory steps are essential to ensure precise calibration. In the next section, you will learn how to integrate these fundamentals into the actual calibration process.
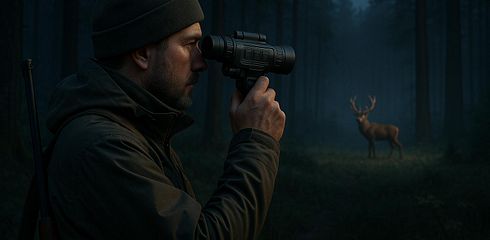
At Gunfinder, you will find not only a wide selection of distance meters but also the right accessories and expert advice – perfect for hunters and shooters who rely on precise measurements.
Step-by-Step Calibration Process
Now that all preparations are complete, you can start calibrating your distance meter. This process builds directly on the previously set reference distance and guides you through measurement, analysis, and adjustment to achieve precise results.
Measuring a Reference Distance
Place your distance meter exactly at the starting point of the reference distance and use a tripod to ensure maximum stability during measurements. This avoids movements that could distort the results and secures reproducible values.
Pay attention to the hook at the end of the measuring tape, as this can introduce potential sources of error. Repeat the measurement for verification and note the exact value as a basis for all further calculations.
Conducting and Analyzing the Measurements
Perform ten individual measurements from the same fixed point and carefully record each value. These values (Xi) serve as the basis for statistical calculations.
Calculate the average of the measurement data as well as the systematic deviation, which results from the difference between the average and the baseline. Then determine the standard deviation from the individual values – a low standard deviation indicates that the measurements are consistent.
You calculate the overall accuracy using the formula: Overall Accuracy = Systematic Deviation + 2·Standard Deviation. This value indicates how accurately your distance meter actually works.
Adjusting the Calibration Settings
The adjustment depends on the type of device:
- Laser Distance Meters: Focus on distance measurement with a reference baseline of 3 to 10 meters.
-
Thermal Distance Meters:
- Automatic Mode (A-Mode): Calibration is done via a software algorithm without the need for a lens cap.
- Manual Mode (M-Mode): Here, manual calibration is required.
- Devices with Tilt Sensors: Ensure that the device is calibrated on a level surface and check this with a spirit level. Keep the device absolutely still, as movements can affect calibration.
After strong temperature fluctuations or shocks, you should recheck the accuracy of the device. Additionally, before calibrating tilt sensors, the device must be thermally balanced.
You can recognize a successful calibration by the calibration sequence being completed without error messages. However, if messages such as "ERROR" appear, the calibration has failed and must be repeated.
In the next section, we will look at common calibration errors, how to avoid them, and what maintenance intervals are sensible for optimal device performance.
sbb-itb-1cfd233
Troubleshooting and Maintenance
Even with correct calibration, unforeseen influences can affect the results. Regular maintenance and an understanding of common sources of error are crucial to ensure measurement accuracy in the long term.
Common Calibration Errors
Incorrect alignment and unstable position can significantly distort the measurement values. With the Garmin Xero A1/A1i, the main pin should be aligned exactly as indicated by the display instructions to avoid miscalibrations. Ensure that the target object is fully within the crosshairs, and ideally use a tripod, as even the smallest vibrations can affect the results.
Environmental influences such as direct sunlight, fog, high humidity, or extreme temperatures can also impair measurement accuracy. Therefore, it is advisable to calibrate under stable conditions.
By recognizing and avoiding these factors, you can ensure the precision of your device and optimally implement your maintenance plan.
Maintenance and Recalibration Plan
Regular maintenance, ideally every 6 to 12 months, is crucial for consistent accuracy. With intensive use or special events, more frequent recalibration may be necessary. Manufacturers like Leica recommend calibration especially after a fall or prolonged non-use.
Situations that require immediate recalibration include:
- Falls or strong shocks
- Extreme temperature fluctuations of more than 20 °C
- A storage period of over three months without use
- Visible damage to the housing or optics
For daily care, you should clean the optics with a soft, lint-free cloth and protect the device from dust and moisture. Regularly check the battery level, as weak batteries can lead to inaccurate measurements. For devices with sensor calibration, such as the Finder series, it is advisable to perform calibration as soon as image quality deteriorates. A dry, temperature-stable storage also contributes to longevity and accuracy.
Using Calibration Certificates
Calibration certificates provide a helpful reference to verify the accuracy of your device.
Keep the certificate safe, as it documents systematic deviations and the guaranteed accuracy (e.g., ±1–2 mm at 20 m). If this information is missing, you can instead use the data from the user manual.
Compare your measurement values with the reference values specified in the certificate. If the deviations are outside the specified tolerance, recalibration or a check by the manufacturer is required.
On Gunfinder.de, you will find a wide selection of distance meters from various manufacturers. Many devices come with technical documentation and calibration certificates. Additionally, user reviews and experiences on the platform provide valuable tips for maintenance and calibration.
Distance Meter Models and Calibration Functions
A distance meter with the right calibration functions can make a difference. Modern devices offer a range of calibration options – from simple automatic modes to precise manual procedures. Below, we take a look at how different models implement these functions and what makes them interesting for hunters and shooters in Germany.
Comparison of Popular Models
The selection of distance meters is vast, and each model has its own strengths. Here is an overview of some of the most popular models and their calibration functions:
| Model | Calibration Modes | Measuring Range | Special Features |
|---|---|---|---|
| Leica DISTO | Manual (Reference Measurement) | 0.05–200 m | Calibration certificate, statistical analysis |
| Pulsar Merger LRF | Manual & Automatic | Up to 1,000 m | Auto mode, digital display |
| Garmin Xero A1/A1i | Digital Workflow | Archery-specific | Step-by-step guidance, pin setup |
| LaserRange-Master i5 | Guided (Tilt Sensor) | Up to 1,000 m | Screen instructions, simple process |
The Leica DISTO series is known for its high precision in manual calibration. With an accuracy of ±1 mm and equipped with a calibration certificate, this model is ideal for users who value accuracy. The calibration process requires at least 10 measurements from a fixed point to calculate the average and standard deviation.
The Pulsar Merger LRF combines manual and automatic calibration modes. In automatic mode, the device performs the calibration independently, while the manual mode offers more control. This versatility makes it particularly attractive for hunters working in different scenarios.
The Garmin Xero A1/A1i is specifically aimed at archers and offers a digital calibration workflow. Calibration is done step by step via the display, minimizing miscalibrations. The brightness adjustment for the pin and crosshairs ensures that the device can be optimally used in various lighting conditions.
Devices with automatic modes and clear digital instructions, such as the Pulsar Merger LRF or the Garmin Xero, save time and reduce potential errors. An intuitive user interface is a clear advantage here.
Gunfinder's Distance Meter Selection
If you are looking for a distance meter, Gunfinder offers a comprehensive selection tailored to the needs of German hunters and shooters. The platform lists models with robust calibration functions and user-friendly features, allowing you to compare effectively.
Gunfinder provides detailed information on calibration modes, measuring ranges, and technical specifications. User reviews and experiences are particularly helpful, offering valuable tips on calibration and maintenance.
Another advantage: Many devices on Gunfinder come with technical documentation and calibration certificates – an important criterion for professional users. The platform also considers local requirements such as metric units, safety standards, and preferred brands, making selection easier for the German market.
For beginners, there are models with simplified calibration processes, while experienced users can opt for devices with advanced features. Thanks to the combination of a wide product selection, detailed information, and an active community, Gunfinder is an ideal place to find the perfect distance meter.
Conclusion
Regular calibration of your distance meter is crucial to ensure precise measurement results. Even the highest quality devices can develop deviations without regular checks. External influences such as shocks or temperature fluctuations can impair measurement accuracy over time, leading to inaccurate data or missed targets.
The calibration process is clearly structured: A precise reference distance is set up with a certified steel measuring tape. Then, you perform at least ten measurements from the same point, calculate the average, and adjust systematic deviations. It is advisable to perform calibration after shocks, during extreme temperature fluctuations, or at regular intervals. These steps form the basis for the long-term reliable function of your device.
Maintenance also plays a central role in securing accuracy in the long term. Many modern devices feature automatic calibration modes that significantly simplify the process and reduce potential sources of error. With consistent calibration, you achieve a typical accuracy of ±1–2 mm at distances of 10 to 20 meters. Keep the calibration certificate safe – it documents the precision of your device and is essential in many professional applications.
If you are looking for a distance meter that meets your requirements, Gunfinder offers a wide selection. Many of the devices come with calibration certificates and user-friendly features. Thanks to detailed product descriptions and user reviews, you can easily find a model that meets both your accuracy requirements and is easy to calibrate.
FAQs
How do you know that your distance meter needs to be recalibrated?
A distance meter should be recalibrated when the measured distances no longer appear reliable or precise. Signs of this can be deviations between the displayed and actual values or difficulties of the device in accurately capturing targets.
To check accuracy, it is best to regularly measure known distances and compare the results. If it turns out that the values do not match, recalibration is necessary. This ensures that your distance meter continues to work precisely and delivers reliable results.
What typical errors can occur when calibrating a distance meter and how do you avoid them?
Calibrating a distance meter requires precision, but there are some typical pitfalls that can impair accuracy. However, with a little attention, these can be easily avoided:
- Incorrect alignment of the device: Even minimal deviations in alignment can distort the results. Ensure that the distance meter is precisely aligned with the target.
- Unsuitable environmental conditions: Poor lighting conditions or extreme weather conditions such as dense fog can significantly impair measurement accuracy. Perform calibration under clear and stable conditions.
- Incorrect device settings: Before starting, check that all settings are correct and comply with the manufacturer's specifications. Small errors here can have a large impact on the results.
A close look at the user manual helps avoid these errors. Perform calibration in a quiet environment with clear visibility and ensure regular maintenance and cleaning of the device. This way, your distance meter remains precise and ready for use at all times!
What is the difference between manual and automatic calibration of a distance meter?
Manual calibration means that you take action yourself to improve the accuracy of the distance meter. You can use reference points to precisely adjust the measurement values. This method gives you more control but requires a certain level of technical understanding.
Automatic calibration is done by the device for you. Using integrated sensors and algorithms, the distance meter adjusts its settings independently. This saves time and is very convenient, but offers less room for individual adjustments if needed.