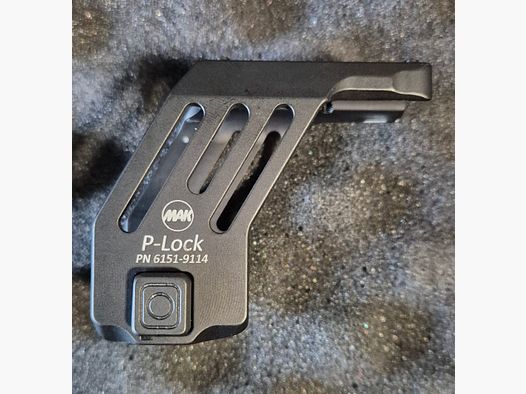
Reptilia DOT 1.93-Inch Mount for Aimpoint Micro
≈ $176
Price at the dealer: 157.01 €. Converted at the ECB rate as of October 19, 2026.
No permit required (18+)
72479 Straßberg, Germany
15
ID: 9897151
Purchase from outside the EU: The firearm goes through an importer in your country, the dealer handles the export.
How buying from Europe works
Shop safely with Gunfinder
Our AI-powered seller identity verification makes Gunfinder the safest marketplace online.
Learn more
Details
- Original language
- German
- Category
- Condition
- New
- Location
- 🇩🇪 72479 Straßberg, Germany
- Availability
- In stock
Freshness
This listing is based on a mirrored offer, where the listing data was synced to us from a shop, dealer, or external marketplace. Please note that temporary price discrepancies may occur due to possible delays in data transmission.
- Source
- Black Raptor
- Last updated
- about 4 hours ago
Description
Note:
The item is located abroad. Please note that delivery conditions, shipping times, and/or the purchase process may differ.
.br-product h2{font-size:1.2rem;margin-top:28px;}
.br-product h3{font-size:1rem;margin:0 0 8px;}
.br-product ul{padding-left:18px;}
.br-product li{margin-bottom:7px;}
.br-product .info-box{background:#ffdddd;border-left:6px solid #c40000;padding:12px;margin:20px 0;}
.br-product .tip-box{background:#eef6ff;border-left:6px solid #2a6fdb;padding:12px;margin:20px 0;}
.br-product .trust-box{background:#eaf7ea;border-left:6px solid #2f8f2f;padding:12px;margin:20px 0;}
.br-product .compare-box{background:#f5f5f5;border-left:6px solid #444;padding:12px;margin:20px 0;}
.br-product details{background:#f2f2f2;padding:10px;margin-bottom:8px;border-radius:4px;}
.br-product summary{font-weight:600;cursor:pointer;}
Reptilia DOT 1.93-Inch Mount for Aimpoint Micro takes on the task of positioning a compatible red dot sight at a defined height and interface. This product is not a universal spacer: the counterpart and dimensions determine whether it fits the existing setup.
When mounting a scope or red dot sight, wrong purchases rarely happen due to insufficient load capacity. More often, the main tube, footprint, height, cant, or base do not match. Therefore, the selection starts with the mechanical interface and only ends with the natural head position behind the optic.
What this mount handles in the system
System chain: firearm or rail → Reptilia DOT 1.93-Inch Mount for Aimpoint Micro → matching red dot footprint → sight line.
The fixed clamping is intended for permanently set optics. Its advantage is a compact setup without additional joints or adapter layers.
Additionally required: red dot sight with matching footprint as well as the base or counterpart specified in the title. Depicted optics, firearms, and tools are not automatically included.
Correctly distinguish footprint, height, and sight line
The footprint describes the mechanical connection between optic and mount. The mounting base describes the connection to the firearm. The optical height describes where the sight line lies above the rail. These three specifications must not be confused: a matching Aimpoint Micro, ACRO, MPS, MRO, or 509T reference does not say anything about the desired height.
Height must be read together with the optic’s build height. Terms like Lower 1/3 or 1.93 inches refer to different ergonomic concepts. Higher can be useful with safety glasses, hearing protection, or upright head position but increases the deviation between barrel and sight line at short distance.
Compared to an adapter plate combination, a directly fitting mount reduces the number of parts. An adapter plate only makes sense if it creates a truly needed interface; it changes height, screw length, and possible tolerance points.
Key features
Optical axis height: 1.93 inches / 49 mm
Construction from 7075-T6 aluminum
Mounting base: M1913 Picatinny
Hard anodized Type-III surface
Guided version: Color: Black, Flat Dark Earth Anodized. Color variants do not change function; barrel diameter, height, cant, footprint, and firearm attachment are technical selection criteria.
Our assessment
Reptilia DOT 1.93-Inch Mount for Aimpoint Micro suits shooters who already know footprint, mounting base, and desired sight height. The advantage lies in a clear, as short as possible connection between optic and counterpart. Additional adapters can be useful but increase build height, screw count, and possible error points.
Do not buy if footprint or base do not clearly fit or a different optical height is needed. A very high-quality mount with the wrong dimension remains a wrong purchase; quality cannot compensate for missing compatibility.
Black
-Raptor-Short summary: Buy if: The listed dimensions match the actual setup and exactly this system function is needed. Don’t buy if: Footprint or base don’t clearly fit, a different optical height is needed, or an additional component is only meant to fix a fundamentally wrong height or interface.
Practical tip: Footprint is more important than brand name Compare the underside of the red dot sight with the specified mount. Two optics from the same brand can use different footprints; adapter plates also change height and screw length. The optic must rest fully on the surface. A plate must not be tightened “floating” over screws or locating pins.
Practical tip: Plan sight height as a complete line Mounting height, construction height of the red dot sight, and possibly the height of a magnifier together form the optical axis. What matters is whether head position and existing backup sights fit – not whether a single number is considered “high” or “low.”
Practical tip: Check screw length Screws that are too long can bottom out in the counterpart before the optic is clamped; screws that are too short engage too few threads. Use only the combination approved for optic and mount and follow the specified torque values.
What changes on the system after a mount change
With Reptilia DOT 1.93-inch mount for Aimpoint Micro, not just a component is replaced. Position, height, and possibly tilt of the red dot sight change the sight line. After every new or remount, the previous zero point is therefore not a reliable assumption. The system is rechecked and documented with the intended ammunition.
In a neutral version, the internal adjustment range remains more symmetrical around the existing base, as far as optic and firearm allow. The required travel results from distance, ballistics, and scope, not from a general recommendation.
Torque values always belong to the specific connection. Rail clamp, ring cap, and optic manufacturer can specify different values. Threadlocker, lubrication, or dry mounting change preload and are only used as required by the respective manufacturer instructions.
Height specifications from different manufacturers are only comparable if the same reference point is used. Depending on the product, a specification can range from the rail top edge to the optical center axis or to another defined surface. Therefore, never compare just two millimeter values alone, but read dimension definition, tube diameter, and actual sight line together. Also convert and compare inch and millimeter values only after clarifying the measurement reference. If a clear dimension definition is missing, it must not be derived from a product photo. The manufacturer’s definition takes precedence.
Fine control marks on approved screw connections later show movement without regularly retightening “just in case.” For QD versions, also document groove position and contact direction; for fixed mounts, a clear positioning of the base is sufficient. Any visible shift, new ring shadow, or unexplained zero shift is first checked mechanically before corrections on the turret hide the cause.
For later modifications, note SKU, tube size or footprint, height specification, forward tilt, and groove used. Especially within a model family, externally almost identical versions can be technically different. This documentation prevents a different variant from being mistakenly treated as equivalent after cleaning, transport, or optic change. After a hard impact or visible damage, the mount is professionally checked before further use. Even without visible damage, the zero point after unusual stress is
tung erneut zu bestätigen.
Montage sequence without unnecessary sources of error
Unload the firearm and lay it down safely. First position the mount without the optic on the intended base: check sufficient groove engagement, distance to bolt and ejection port, as well as operating space for levers. Then bring the optic to natural cheek weld at eye distance.
Do not align the reticle to a random housing edge, but to the actual horizontal weapon axis. Tighten screws only according to the specifications of the involved manufacturers; values for base, ring caps and optic are not automatically identical. After the first shooting session, check markings and fit without routinely tightening screws “by feel.”
Which version fits?
Four answers must be clear: Does the optic mount fit? Does the weapon or rail base fit? Does the height allow a natural head position with full clearance? Is the entire setup including bolt, charging handle and adjustment rings operable? Only when all four points are correct, functions like QD, offset or additional accessory interfaces can be meaningfully evaluated.
Comparison and suitable alternatives: Compare alternatives first by interface and height. QD, offset or direct mount are functions with their own purpose, not general quality levels.
Reptilia DOT Lower-1/3 mount, 39 mm Trijicon MRO®
Reptilia DOT Lower-1/3 mount, 39 mm Aimpoint ACRO/ MPS
Reptilia DOT 1.93-inch mount for Trijicon MRO
Technical data
Height of optical axis: 1.93 inch / 49 mm
Construction from 7075-T6 aluminum
Mounting base: M1913 Picatinny
hard anodized Type-III surface
Fit note: Product images are not sufficient for compatibility check. Decisive are the designated optic mount, weapon or rail base, tube size or footprint, and the specific version.
FAQ
Which footprint must fit? Exactly the optic mount designated in the title. Aimpoint Micro, ACRO/MPS, Trijicon MRO and Holosun 509T are different interfaces. Does the mount fit every rail? Only if the weapon base corresponds to the confirmed rail mount and groove dimension as well as clamping surface fit. What does the specified height mean? It describes the mounting geometry of this version. The actual sight line adds the height of the optic and weapon base. Can an adapter plate be used? Only if it is approved for both interfaces. It changes build height, screw length and number of connections. What else is required? Red dot sight with matching footprint as well as the base or counterpart designated in the title and the confirmed screw and torque specifications. (Show description in original language)
.br-product-v3{--br-ink:#17201c;--br-muted:#54615b;--br-line:#d9e0dc;--br-soft:#f5f7f5;--br-deep:#10271d;--br-gold:#f2d58e;color:var(--br-ink);font-size:16px;line-height:1.68;max-width:1040px;margin:0 auto}.br-product-v3 *{box-sizing:border-box}.br-product-v3 p{margin:0 0 12px}.br-product-v3 .br-hero-v3,.br-product-v3 .br-final{background:var(--br-deep);border-radius:18px;padding:clamp(24px,5vw,48px);margin:0 0 28px}.br-product-v3 .br-hero-v3,.br-product-v3 .br-hero-v3 p,.br-product-v3 .br-hero-v3 strong,.br-product-v3 .br-hero-v3 span,.br-product-v3 .br-final,.br-product-v3 .br-final p,.br-product-v3 .br-final strong,.br-product-v3 .br-final span{color:#fff!important;opacity:1!important}.br-product-v3 .br-eyebrow{font-size:.78rem;line-height:1.3;letter-spacing:.12em;text-transform:uppercase;font-weight:800;margin-bottom:10px;color:var(--br-gold)!important}.br-product-v3 .br-hero-title{display:block;font-size:clamp(1.65rem,4vw,2.55rem);line-height:1.13;margin-bottom:14px;font-weight:850}.br-product-v3 .br-section-title{display:block;font-size:clamp(1.18rem,2.5vw,1.42rem);line-height:1.25;font-weight:850;margin:30px 0 13px;color:var(--br-ink)}.br-product-v3 .br-box{background:var(--br-soft);border:1px solid var(--br-line);border-radius:14px;padding:20px;margin:0 0 18px}.br-product-v3 .br-grid{display:grid;grid-template-columns:repeat(2,minmax(0,1fr));gap:14px;margin:0 0 18px}.br-product-v3 .br-card{border:1px solid var(--br-line);border-radius:14px;padding:18px;background:#fff}.br-product-v3 .br-card-title{display:block;font-size:1rem;line-height:1.35;font-weight:850;margin-bottom:8px;color:var(--br-ink)}.br-product-v3 details{border:1px solid var(--br-line);border-radius:12px;background:#fff;padding:0 16px;margin:10px 0}.br-product-v3 summary{cursor:pointer;font-weight:800;padding:14px 0;color:var(--br-ink)}.br-product-v3 details p{padding:0 0 14px;color:var(--br-ink)}.br-product-v3 .br-note{border-left:4px solid #b78c2c}@media(max-width:640px){.br-product-v3{font-size:15.8px;line-height:1.62}.br-product-v3 .br-grid{grid-template-columns:1fr}.br-product-v3 .br-hero-v3,.br-product-v3 .br-final{padding:24px 20px;border-radius:14px}.br-product-v3 .br-box,.br-product-v3 .br-card{padding:16px}}
Reptilia DOT · Aimpoint Micro · 1,93″
Hohe Direktmontage für den Aimpoint-Micro-Footprint Diese DOT-Montage setzt kompatible Aimpoint-Micro-Optiken auf eine optische Achse von 1,93 Zoll beziehungsweise rund 49 mm über der Picatinny-Basis. Die 7075-T6-Konstruktion richtet sich an Nutzer, die bewusst eine hohe Visierlinie und eine direkte, kompakte Schnittstellenkette suchen.
Varianten: RC-100-037 Schwarz und RC-100-038 Flat Dark Earth anodisiert. Die Farbe ändert die Funktion nicht.
Unsere ehrliche Einordnung
1,93″ ist eine ergonomische Entscheidung, kein automatisches Upgrade. Die höhere Visierlinie kann eine aufrechtere Kopfhaltung unterstützen, vergrößert aber zugleich den Abstand zwischen Lauf- und Visierachse. Wer eine niedrigere Co-Witness-Linie bevorzugt, braucht eine andere Montagehöhe.
Der Footprint ist ebenso wichtig wie die Höhe: Diese Ausführung ist für Aimpoint Micro ausgelegt, nicht für MRO, ACRO/MPS oder andere mechanische Aufnahmen.
Passt gut, wenn … … deine Optik den Aimpoint-Micro-Footprint nutzt, die Basis M1913 Picatinny ist und du bewusst eine 1,93″-Visierlinie planst.
Passt eher nicht, wenn … … dein Red Dot einen anderen Footprint hat, du Lower-1/3 oder eine niedrigere Linie suchst oder die Schienenbasis nicht Picatinny ist.
Praktische Wirkung der Merkmale
1,93″ / 49 mm Die Höhe verändert Kopfposition und Nahbereichs-Offset deutlich. Sie sollte zum gesamten Anschlag passen, nicht isoliert gewählt werden.
Aimpoint-Micro-Footprint Direkte mechanische Aufnahme ohne zusätzliche Adapterplatte. Das reduziert Teilezahl, wenn der Footprint wirklich passt.
7075-T6 Aluminium Hochfeste Aluminiumlegierung mit Type-III-Hartanodisierung laut vorhandenen Produktdaten.
M1913 Picatinny Die Unterseite benötigt eine passende Picatinny-Basis. Ein ähnliches Profil ist kein ausreichender Kompatibilitätsnachweis.
Grenzen, Nachteile und Fehlkaufvermeidung
Footprints nicht vermischen: Aimpoint Micro, MRO, ACRO/MPS und 509T sind unterschiedliche Schnittstellen.
Höhe bewusst wählen: 1,93″ kann ergonomisch passen, ist aber nicht für jeden Schaft und jede Anwendung ideal.
Adapter nicht blind ergänzen: Zusätzliche Platten verändern Höhe, Schraubenlänge und Toleranzkette.
Nach Montage Nullpunkt prüfen: Jede Änderung an Position oder Montage kann die Treffpunktlage beeinflussen.
Montage und Kontrolle
Nur am sicheren, entladenen System arbeiten. Montage vollständig auf der vorgesehenen Picatinny-Nut setzen, Optik ohne Verkanten auf den vorgesehenen Footprint auflegen und nur die für Optik und Montage freigegebenen Schrauben verwenden.
Drehmomente nicht zwischen unterschiedlichen Verbindungen übertragen. Nach Montage Sitz, Bedienfreigang und Treffpunktlage kontrollieren; nach außergewöhnlicher Belastung erneut prüfen.
Technische Daten mit Praxisdeutung
Optikaufnahme Aimpoint-Micro-Footprint – mechanische Kernkompatibilität dieser Ausführung.
Montagebasis M1913 Picatinny – direkte Rail-Klemmung.
Optische Achse 1,93″ / ca. 49 mm – bewusst hohe Visierlinie.
Material 7075-T6 Aluminium – steife, leichte Direktmontage.
Oberfläche Type-III hartanodisiert.
Farbvarianten RC-100-037 Schwarz · RC-100-038 Flat Dark Earth anodisiert.
Lieferumfang
Bestätigt beschrieben: 1× Reptilia DOT 1,93″ Aimpoint-Micro-Montage in gewählter Farbe. Red Dot, Waffe und zusätzliche Adapter sind nicht Bestandteil dieser Produktbeschreibung.
FAQ
Passt die Montage zu Trijicon MRO? Nein. MRO nutzt eine andere Aufnahme. Diese Ausführung ist für den Aimpoint-Micro-Footprint vorgesehen. Was bedeutet 1,93 Zoll? Es beschreibt die definierte optische Höhe dieser Montage über der Picatinny-Basis und damit die resultierende Visierlinie. Unterscheiden sich Schwarz und FDE technisch? Nein. Die geführten Varianten unterscheiden sich in der Farbe, nicht in Footprint oder Bauhöhe. Muss nach der Montage neu kontrolliert werden? Ja. Sitz und Treffpunktlage sollten nach Neu- oder Ummontage immer geprüft werden.
Black Raptor · Höhe und Footprint getrennt denken
1,93″ ist sinnvoll, wenn dein kompletter Aufbau darauf ausgelegt ist. Die Reptilia DOT ist eine klare Direktmontage für Aimpoint-Micro-Optiken – hochwertig, aber nur dann richtig, wenn Footprint, Picatinny-Basis und gewünschte Visierlinie zusammenpassen.