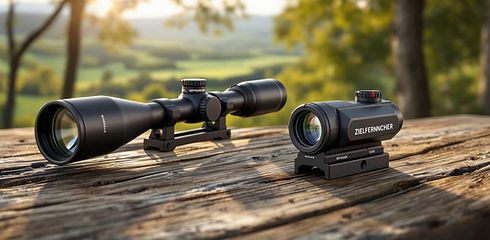
Hunting with a Red Dot Sight: 7 Field Tests in the Hunting Grounds

A red dot sight can help me aim quickly—but I still have to identify the game with certainty. It doesn’t magnify. So I mainly check whether I can clearly distinguish the target from the background, keep the dot visible, and confirm the point of impact.
To do this, the article outlines seven tests:
- Stand hunting: Target acquisition and group size in daylight.
- Driven hunt simulation: Tracking the target and hitting moving targets.
- Stalking: Acquiring the dot after moving and against changing backgrounds.
- Rain: Visibility, operation, and point of impact in wet conditions.
- Dusk: Dot brightness and visibility of low-contrast targets.
- Short range: Target acquisition and control from different shooting positions.
- After the hunt: Checking the mount, accuracy, and point of impact.
I keep the equipment and measurement conditions as consistent as possible and separate measurements from impressions. The results tables are still empty: this article provides a test plan, not measured test results. From this, I can determine which dot size, brightness, and mount suit my needs.
<u>For me, safety comes before speed.</u> Shooting practice belongs at an approved range. If I’m unsure about identifying the target, the direction of fire, or the backstop, I don’t take the shot.
The Best Optic for Driven Hunts
sbb-itb-1cfd233
Test Setup, Safety, and German Law
To make the seven practical tests with a red dot sight comparable, they need a clearly defined framework.
Keep Equipment and Measurements Consistent
Use the same rifle, ammunition, red dot sight, and mount wherever possible. Keep the zero and shooter the same, too. Check the point of impact at an approved shooting range before starting the test. Record the zeroing distance, caliber, bullet type, dot size, brightness setting, and mount height. If you change the equipment, start a separate test series. The results then won’t count as a direct comparison.
Record the date, time, weather, temperature, precipitation, and lighting conditions. Also note the distance, target dimensions, shooting position, and number of repetitions, as well as hits, misses, group size, and malfunctions. Use meters, centimeters, and a decimal point.
Measure the acquisition time from the start signal until the red dot is clearly on the target. Record the time to the shot separately. Evaluate ten repetitions and report the median and range. Keep the shooting position the same within each series of measurements. The same clear range rules apply to all seven tests.
Use Controlled Targets and a Safe Backstop
These exercises are intended for approved shooting ranges. Other locations are only suitable if their use is legally permitted and safe. Never create an opportunity to shoot at game just to take a measurement. Choose a distance that matches your demonstrated shooting ability, your equipment, and your ability to identify the target safely.
At the range, follow the range rules and the instructions of the range officer. Load only at the designated firing point and as instructed. Beforehand, check the firearm’s loaded condition, chamber, ammunition, and that the optic is securely mounted.
Always keep the muzzle pointed in a safe direction. Keep your finger outside the trigger guard until you fire. Wear hearing and eye protection. Define the shooting area, exclusion zones, and backstop: vegetation or trees are not a substitute for a suitable backstop. Stop immediately if people, animals, or vehicles enter the danger area.
You need a valid hunting license to hunt. Check with the hunt leader in advance which shooting qualifications and requirements apply to driven hunts.
The next test covers a daytime stand hunt.
1. Daytime stand hunt
After the fixed test setup, it’s time for the first practical test from a stand.
Time to a stable sight picture
Simulate a quiet stand hunt from a seated position. Aim with both eyes open and measure the time it takes for the red dot to settle steadily on the target. [1][8]
Measure point of impact and group size
Measure point of impact and group size at 30 and 50 meters and, if suitable, at 100 meters. [8][9]
Dot visibility and target clarity
Assess these separately: Does the red dot remain clearly visible? And is the sight picture clear in daylight?
Point of impact after the stand hunt
Check whether you can reach the controls from your shooting position. Then fire a confirmation group to check the point of impact. [1]
Next, assess performance under the pressure of movement.
2. Driven hunt simulation on moving targets
Now test your aim under the pressure of movement. Use the running boar target at an approved shooting range. At 50 m, plan five target passes in each direction. Keep the target speed and shooting position consistent, and note the dot size and brightness setting.
Time to a stable sight picture
Use a timer or video to measure the time from when the target appears to when you hold the dot steadily on the aiming point. Count each time you lose the dot while tracking. Rate target tracking on a subjective scale: 1 = frequent interruptions, 5 = consistently stable.
Hits and rejected opportunities
Record hits and misses separately and calculate the hit rate. Record unclear hit patterns separately.
Simulate unclear identification or a missing backstop only as a decision to stop—never by preparing to shoot unsafely. Record every decision not to shoot and the reason. A safe decision to stop is not a shooting error.[10][13]
Mounting height and target acquisition
Compare mounting heights only when all other aspects of the setup are the same and the point of impact has been confirmed. Document how the height affects target acquisition time, missed shots and ease of use. Also note cheek weld, head movement and any obstruction caused by the housing.
After normal handling, check that the mount, caps and covers are secure. Deliberate impacts are not part of the test.
3. Stalking through varied terrain
After the driven hunt simulation, use the stalking test to check how quickly you can reacquire the dot in uneven terrain.
Set two fixed routes: one along a forest edge with obstacles and one in an open area with long sightlines. Use the same sling and clothing throughout. Live fire only at a shooting range or in a safe hunting situation with a suitable backstop. Vegetation is not a substitute for a backstop.[6]
Time to a stable sight picture
Repeat each run at least five times on the same controlled target. Starting from a fixed signal, measure the time from the safe carry position until the dot is stable on the aiming point. Record the average, the slowest attempt and any failed attempts to acquire the dot.
First, keep the brightness unchanged and test four situations: dark foliage, bright sky at the forest edge, brown-gray vegetation and a low-contrast target in an open area. Check whether the dot remains visible without excessive blooming. Also note whether you need to adjust the brightness when moving between shade and sunlight.
Mounting height and target acquisition
Measure the total weight in grams and the mounting height to the center of the sight in millimeters. After a 1 km route along a forest edge and through an open area, record how tired you feel. Also document how often and where the muzzle, optic housing and mount snagged.
Assign each mount to one of the following ratings:
“Dot acquired immediately”, “Dot acquired after correction” or “Dot missed”
This helps you see whether movement and obstacles interfere with quick dot acquisition.
A visible dot is no substitute for positively identifying your target. If the sight picture is not clear enough, use binoculars and do not take the shot.[1]
4. Rain and wet lenses
After stalking, the rain test shows whether you can still see the dot quickly and clearly in wet conditions. Compare the dry red dot sight with its performance in drizzle and steady rain. Stay within the manufacturer's waterproofing limits. Keep the firearm, ammunition, mount, point of impact, distance, and shooting position the same.[12][11][14]
Record the duration of the rain in minutes, approximate intensity, temperature in °C, wind, and water source: direct rain, splashes, or wet vegetation. Only include precipitation amounts in your notes if you measured them yourself. Record clarity, dot image, target acquisition time, operation, and point of impact separately. Check visibility and the dot image first, then operation and point of impact.
Clarity and dot visibility
For repeatable comparisons, use the same targets and initially leave the dot brightness unchanged.
A black contrast block and a gray comparison target are suitable, for example.
Rate target recognition and the dot image separately using this scale: 0 = clear, 1 = slight droplets with no effect, 2 = distorted, 3 = target or aiming point significantly impaired. Also note any halo, starburst, crescent, or double images, and whether you need to adjust the brightness.
| Rain level | Enclosed emitter | Open emitter |
|---|---|---|
| Light rain or drizzle | Droplets on the outer lens | Droplets on the lens and in the emitter area |
| Heavier steady rain | Water film and impaired target image | Additional disruption or obstruction of the light path |
| Individual droplets on the front lens | Distortion of the target image and dot image | Additional direct obstruction of the emitter |
An enclosed emitter system protects the emitter area, but not the outer lenses from water or fogging. With open systems, droplets in the unobstructed light path can distort or obscure the dot.[14][15][16]
Operation and cleaning
With wet hunting gloves on, check whether you can operate the brightness controls, on/off switch, protective caps, and any locking mechanism. Note any operating errors, accidental brightness changes, and how long it takes for the target image to become usable again.
Blot off water with a clean lens cloth, if the manufacturer allows it. Do not use sleeves, dirty gloves, or paper. Document cleaning, residual streaks, and possible water ingress into the emitter area or housing separately from water resistance.
Point of impact after the test
Compare the dry reference group with the group fired under the same conditions after rain and cleaning. Record the number of shots, group size, group center, and point-of-impact shift in centimeters or MOA.[17]
5. Low light and low-contrast targets
Test setup
After a stand hunt, driven hunt, and rain, test the red dot in low light and low contrast: does it remain usable for hunting as the remaining light fades?
Use stationary contrast targets with known dimensions at 50 m against a dark forest, gray sky, and backlight. Keep your equipment and shooting position the same, and repeat each setting at least three times.
Record the date, location, time, weather, cloud cover, and lighting conditions. Only enter lux values if you measured them yourself. Observe only with an unloaded firearm. Only shoot when the target and backstop are clearly visible.
Visibility assessment
Compare three brightness levels: the lowest clearly visible setting, a medium setting, and a higher setting. Record the exact setting each time and whether automatic mode is on. Set the dot as low as possible while keeping it clearly visible.
Record separately when a halo appears and when the target outline, fine markings, or separation from the background are lost. Avoid bright displays between runs.
Record in the table when the dot remains clearly distinguishable and when outlines become blurred. Use a separate row for each lighting phase and setting. Always check the backgrounds in the same order. Leave missing values blank.
| Background, each at 50 m | Time / measured lux | Brightness level / automatic mode | Dot / halo | Outline and fine details |
|---|---|---|---|---|
| Dark forest | To be measured | To be checked | To be assessed | To be assessed |
| Gray sky | To be measured | To be checked | To be assessed | To be assessed |
| Backlight | To be measured | To be checked | To be assessed | To be assessed |
A visible dot does not mean you can identify a target safely, nor does it indicate the low-light performance of a scope. Legally, nighttime begins 1.5 hours after sunset and ends 1.5 hours before sunrise. This does not mean hunting is generally permitted.[3][4]
Next is the short-range test.
6. Aiming at short range and controlled shots
After the low-light and rain tests, check at short range how quickly you can bring the dot onto the target and control the shot.
Test setup
Compare standing, kneeling, and supported positions, with five to ten repetitions each at the same short distance. Keep the firearm, ammunition, target size, clothing, and start signal the same. Practice mounting the firearm at an approved range with a unloaded firearm and a suitable backstop.[12][19]
Agree on safe ready positions with the range officer. Low or high ready positions are only permitted if the range rules allow them and the muzzle remains in a safe direction. Start from a neutral ready position, not with the muzzle already pointed at the target. Compare low and high ready separately and note which support you use.
Evaluating target acquisition
Measure two times: Target acquisition runs from the start signal until the aiming point is centered in the target area. Shot release measures the time until you consciously fire after checking the target and backstop. Live-fire runs must be conducted separately and only after the range officer gives permission. Have a second person record hits and safety stops. Calculate the median and range.
Compare the positions directly. This lets you assess speed and control separately.
| Position | Support | Median/range | Posture/hit location |
|---|---|---|---|
| Standing | Unsupported | Target acquisition and shot release | Hold movement, hit location |
| Kneeling | Chosen support | Target acquisition and shot release | Position adjustments, hit location |
| Supported | Fixed support or shooting stick | Target acquisition and shot release | Group size, hit location |
Note the dot size, brightness setting, automatic mode, and eye position. A larger dot is quicker to pick up, but also obscures more of the target: at 25 m, 2 MOA covers around 1.5 cm, while 6 MOA covers around 4.4 cm.[14][18][20]
Practice switching sides unloaded and under supervision first. Live-fire runs are only permitted at a range approved for this purpose. Record additional transition time, head adjustments, and hit location separately. Stop immediately if handling becomes unsafe or you lose control of the target.
7. Accuracy and point of impact after a hunt
Test setup
After transport, rain, or a change of mount, check whether the red dot sight has maintained its point of impact. To do this, check that the sight and mount are secure on the unloaded firearm. Also check the screws, lenses, battery compartment, and barrel for damage and dirt. Dry wet exterior surfaces. Tighten screws only according to the manufacturer's instructions and with a suitable torque tool.[21][24] This lets you identify visible signs of mechanical stress.
Then fire a control group of at least three shots at the shooting range without adjusting the sight beforehand. Keep the conditions the same as for the original comparison group. If you suspect the sight has shifted, first check at 50 m and confirm the result with two more shots. Then compare at the original distance.[21][23] This lets you determine whether the point of impact has remained stable.
Evaluating the point of impact
Compare the center of the group and group size, not individual flyers. Enter the measurements directly in the log:
| Measurement | Baseline | Follow-up check |
|---|---|---|
| Distance, rest, ammunition/lot | Reference conditions | Record whether they match |
| Shot count, group size in cm | Comparison group | Control group |
| Center of impact, horizontal/vertical | Reference position | Deviation in cm |
| Weather | Initial conditions | Current conditions |
| Transport, moisture, mount change | Initial state | Stress and changes |
If the group size increases while the center stays the same, your hold, wind, ammunition, or barrel temperature may be the cause. If the center shifts, check the mount and optic first. There is no universally applicable tolerance in centimeters.
If you suspect a shift in point of impact, pause hunting use until the cause has been identified and the point of impact is correct. Even a mount that looks fine does not replace a control group.[21][22][23] This test checks hunting reliability after a hunt; enter the measurements directly in the overall evaluation.
Results table for all 7 tests
The table brings together the results from the seven individual tests in a consistent format. This lets you compare stand hunting, driven hunts, stalking, rain, dusk, short distances, and point of impact directly.
Metadata: Document the shooter, firearm, ammunition/lot, red dot sight, and mount.
| Test | Distance | Conditions | Repetitions | Acquisition time | Group size | Limitation | Result |
|---|---|---|---|---|---|---|---|
| 1. Daylight stand hunting | open | open | open | open | open | open | open |
| 2. Driven hunt simulation with moving targets | open | open | open | open | open | open | open |
| 3. Stalking through varied terrain | open | open | open | open | open | open | open |
| 4. Rain and wet lenses | open | open | open | open | open | open | open |
| 5. Dusk and low-contrast targets | open | open | open | open | open | open | open |
| 6. Aiming at short range and controlled shots | open | open | open | open | open | open | open |
| 7. Accuracy and point of impact after a hunt | open | open | open | n. a. | open | open | open |
Legend: “open” means not yet recorded. “n. a.” means not applicable—for example, for group size when none is recorded.
For each test, record the acquisition time, including the median and range, as well as the number of repetitions. Give group sizes in cm.
Advantages, limitations, and equipment selection
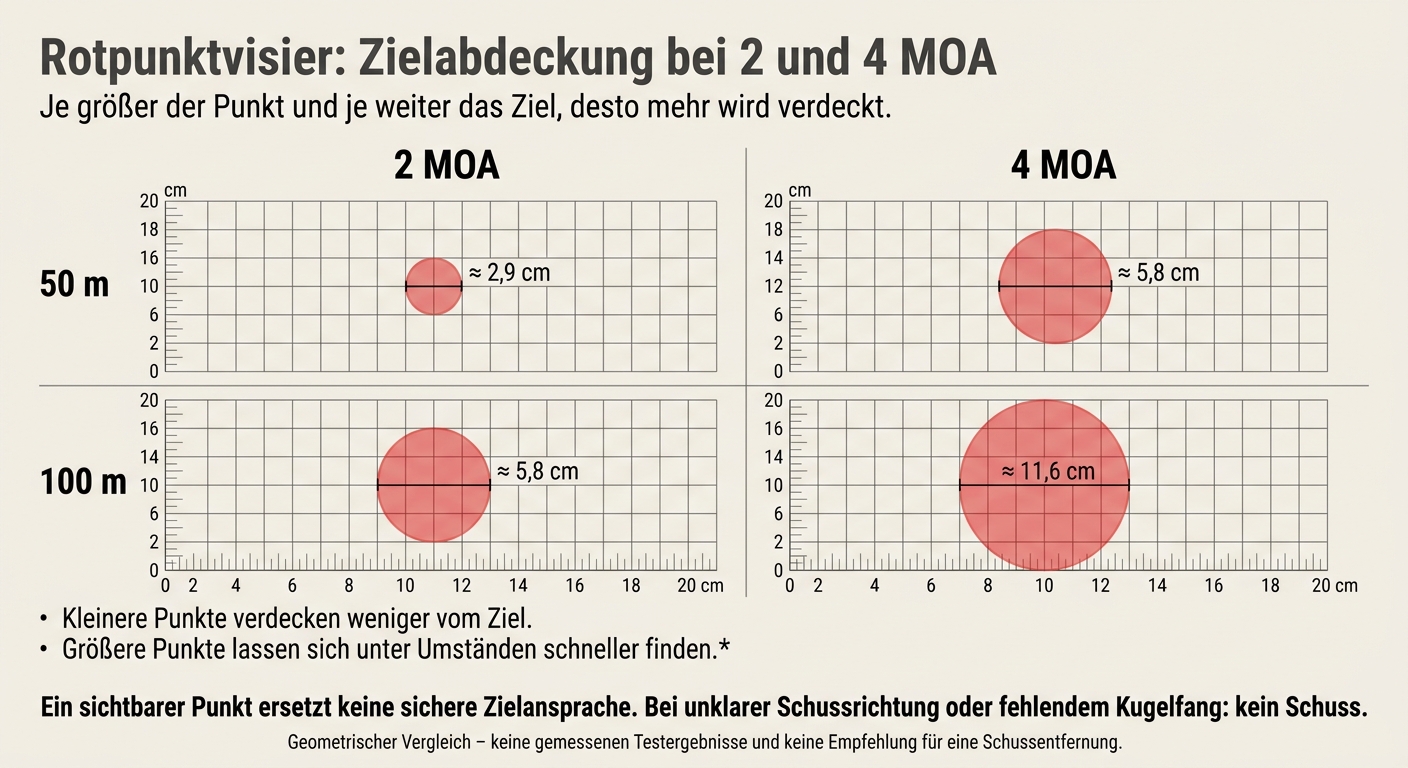
Red dot sight: target coverage at 2 and 4 MOA
The tests show that a red dot can speed up aiming when the dot size, brightness, and mount suit the intended use.
| Aspect tested | Potential advantage | Selection criterion or limitation |
|---|---|---|
| Target acquisition from a stand and at short range | The red dot can make it easier to aim quickly. | Dot size and brightness must be right; practice is still necessary. |
| Both-eyes-open aiming in the driven hunt simulation | Can make it easier to maintain situational awareness and track the target. | Requires a repeatable shooting position; target identification and a safe backstop remain essential. |
| Compact handling while stalking | Compact designs can keep the firearm handy. | Compare weight and the risk of snagging during the test. |
| Practical range | Good at short ranges; suitable for medium ranges only when the target is clearly identified. | There is no universal distance limit. |
Three factors are central to choosing one: dot size, brightness, and mount.
Choosing dot size, brightness, and mount
Dot size determines how much of the target is obscured. At 100 m, 2 MOA covers about 5.8 cm, while 4 MOA covers about 11.6 cm. At 50 m, each covers half as much. Smaller dots obscure less, while larger ones may be quicker to find. So choose a dot size that suits the distance and target size.[26][27]
Set the brightness as low as possible while keeping the dot clearly visible. Check the setting against a bright background, dark vegetation, and at dusk. Also test any automatic brightness setting. Enclosed designs better protect the emitter from water and dirt, but the outer lens remains vulnerable. Follow the manufacturer's limits for water resistance, temperature, and battery reserve.[5][25][28][29]
The mount must fit the firearm, mounting interface, and height. Check that your cheek rests naturally on the stock and that the bolt and safety remain easy to operate. Use the specified torque. Confirm the point of impact with the intended ammunition after mounting, a heavy impact, or removal and reinstallation.[1]
Find optics on Gunfinder
When searching on Gunfinder, check dot size, mount, and condition. For used items, ask for pictures of the lenses, battery compartment, and mounting surfaces. Also ask about point-of-impact stability and check what's included. A listing proves neither suitability nor legal permissibility for your intended use.[8]
Conclusion: When a red dot is right for hunting
A red dot is an aiming aid, not an all-purpose solution. The seven tests covering stand hunting, driven hunts, stalking, rain, dusk, close range, and point of impact show when it can help you act quickly in the field—and where its limits lie.
| Category | Use | Key requirement |
|---|---|---|
| Best suited for | Short range, controlled shots | Clearly identified game, stable position, sufficient light, and a safe backstop |
| Only with practice | Moving targets, stalking, and changing conditions | Practiced shooting position, clear view, safe shooting sector, and confirmed point of impact |
| Better with magnification | Longer distances, small target details, extended observation | Proven accuracy and positive identification; magnification alone isn't enough |
| No shot | Unclear background, insufficient light, unsafe shooting direction, or no safe backstop | Do not shoot as long as there is any uncertainty |
Set your maximum distance based on verified shot groups. The farther away the target is, the more time you need to observe it. Even with magnification, you must be able to identify the game with certainty in low-contrast conditions.[6][7][31]
Identifying the target safely comes before speed: If you’re unsure about the target, shooting direction, or backstop, don’t shoot.[6][30]
FAQs
Is a red dot sight suitable for astigmatism?
Red dot sights are often less suitable for astigmatism (corneal curvature): the red dot may appear distorted or star-shaped [1]. However, this isn’t true of every model. Users report seeing a clearly defined reticle with the Sig Sauer ROMEO4T and Holosun HS515C-M, even with astigmatism [2].
The best way to find out which models work for your eyes is to try out different models yourself.
How can I tell if it’s a shooting error rather than a sight adjustment issue?
Shooting errors usually show up as a large, widely spread group of hits. First, check your shooting rest and technique. An unstable position, inconsistent hold, breathing errors, or poor trigger technique may be the cause.
By contrast, a misadjusted sight with a stable rest is more likely to produce tight groups that are off-center. If the hits are close together but consistently miss the point of aim, adjusting the sight using the click adjustment makes sense. Always shoot groups of three to identify meaningful patterns.
How often should I check my point of impact?
Regularly check the point of impact of your red dot sight. After transport, a fall, heavy impacts, or extended storage, check it and zero the sight again if needed. Do the same after changing ammunition or making technical changes to the firearm or optic.
If you notice unusual deviations in your shot pattern, fire a confirmation shot. Also check regularly that the mount is secure: recoil and temperature fluctuations can loosen screws.