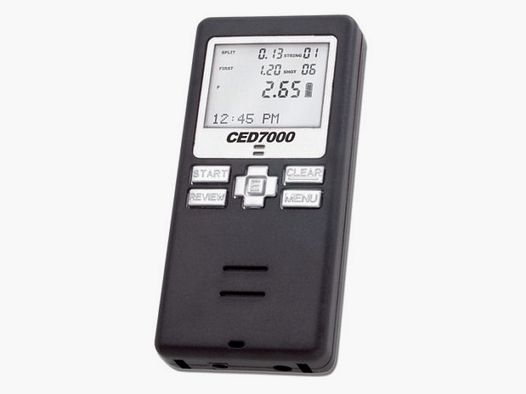
Double Alpha Academy Replacement Battery for CED 7000
≈ $17
Price at the dealer: 15.50 €. Converted at the ECB rate as of November 17, 2026.
No permit required (18+)
20831 Seregno, Italy
4
ID: 9959063
Purchase from outside the EU: The firearm goes through an importer in your country, the dealer handles the export.
How buying from Europe works
Shop safely with Gunfinder
Our AI-powered seller identity verification makes Gunfinder the safest marketplace online.
Learn more
Details
- Original language
- Italian
- Category
- Condition
- New
- Location
- 🇮🇹 20831 Seregno, Italy
- Availability
- In stock
Freshness
This listing is based on a mirrored offer, where the listing data was synced to us from a shop, dealer, or external marketplace. Please note that temporary price discrepancies may occur due to possible delays in data transmission.
- Source
- I migliori accessori per armi
- Last checked with the dealer
- about 10 hours ago
Description
Note:
The item is located abroad. Please note that delivery conditions, shipping times, and/or the purchase process may differ.
You can purchase a new battery and replace it yourself. However, be careful: the small connectors and parts inside your timer can easily be damaged if handled incorrectly.
You can also have us replace the battery for you. Just send us your timer, and we’ll charge you only for the battery and the cost of mailing the timer back to you.
If you choose to replace the battery yourself, follow these instructions:
Remove the small screws from the back of the timer. Then, using a flat-blade knife, pry open the two halves of the timer. Try to unlock both sides before gently pulling them apart. Pull the halves straight away from each other, not at an angle, as two sets of plugs disconnect when you separate the parts.
** In the oldest models, wires connect the two halves (first and second production only, for timers dating back to June-July 2006). In this case, do not separate the parts too far, as you do not want to pull the wires loose.
Unplug the old battery and insert the new one. Use a piece of double-sided tape or hot glue to hold it in place so it does not move around. Reassemble the timer, making sure the plugs are aligned correctly, as well as the small plastic lip between the top “Start” and “Review” buttons. Press the two halves together until they click into place, then replace the screws.
Do not overtighten the screws!
Dispose of the old battery according to regulations. (Show description in original language)
After approximately 2 years of use, you are likely to see a deterioration in the performance of your rechargeable battery in your CED7000 shot time. This is normal, and a familiar situation with all cell phone, PDAs and other devices using small rechargeable batteries.
You can purchase a new battery and replace it yourself; however, you must do so with caution, as the small connectors and parts in your timer can easily be damaged if mishandled.
You can always choose to have us change the batter for you – in which case you need to send us your timer, and we will charge you only for the battery and the cost of mailing the timer back to you.
Should you choose to change the battery yourself, follow these instructions:
Remove the small screws from the back of the timer, and then using a flat blade knife, pry open the two halve of the timer. Try to unlock both sides before gently pulling them apart – you want to pull the halves straight away from each other, not at an angle, as there are two sets of plugs that are being unplugs as you separate the parts.
** In the oldest models, there are wires connecting the two halves (first and second production only, for timers dating back to June-July 2006). In this case do not separate the parts too far apart – as you do not want to pull the wires loose.
Unplug the old battery, and insert the new one. Use a piece of double sided tape or warm glue to hold it in place so it does not rock around. Assemble the timer again, pay attention to align the plugs correctly, as well as the small plastic lip between the top “Start” and “Review” buttons. Press the two halves together until they click into place, and reassemble the screws.
Do not over tighten the screws!
Dispose of the old battery according to regulation.
You can purchase a new battery and replace it yourself; however, you must do so with caution, as the small connectors and parts in your timer can easily be damaged if mishandled.
You can always choose to have us change the batter for you – in which case you need to send us your timer, and we will charge you only for the battery and the cost of mailing the timer back to you.
Should you choose to change the battery yourself, follow these instructions:
Remove the small screws from the back of the timer, and then using a flat blade knife, pry open the two halve of the timer. Try to unlock both sides before gently pulling them apart – you want to pull the halves straight away from each other, not at an angle, as there are two sets of plugs that are being unplugs as you separate the parts.
** In the oldest models, there are wires connecting the two halves (first and second production only, for timers dating back to June-July 2006). In this case do not separate the parts too far apart – as you do not want to pull the wires loose.
Unplug the old battery, and insert the new one. Use a piece of double sided tape or warm glue to hold it in place so it does not rock around. Assemble the timer again, pay attention to align the plugs correctly, as well as the small plastic lip between the top “Start” and “Review” buttons. Press the two halves together until they click into place, and reassemble the screws.
Do not over tighten the screws!
Dispose of the old battery according to regulation.