Achtung: Il tuo browser è obsoleto. Nota che Gunfinder potrebbe non funzionare correttamente. Ti consigliamo di aggiornarlo appena possibile. Scopri di più qui!

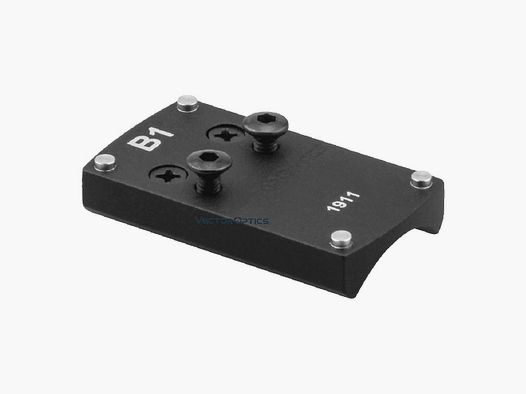
Eemann Tech supporto in alluminio per red dot per fresatura Bomar 1911/2011 (tipo: V1)

≈ 83 €
Prezzo dal rivenditore: 920 kr. Convertito al tasso BCE del 13 novembre 2026.
Di libera vendita
288 33 Vinslöv, Svezia
0
ID: 11510448
Acquisto da fuori UE: l'arma passa tramite un importatore nel tuo paese, il rivenditore si occupa dell'esportazione. Come funziona l’acquisto dall’Europa
Acquista in sicurezza con Gunfinder
La nostra verifica d'identità con IA sui venditori rende Gunfinder il marketplace più sicuro online. Scopri di più
Il venditore
Vinslövs Vapen
Rivenditore

Dettagli

Lingua originale
Svedese
Categoria
Condizione
Nuovo
Posizione
🇸🇪 288 33 Vinslöv, Svezia
Disponibilità
disponibile

Aggiornamento

Questa offerta si basa su una sincronizzazione dei dati, in cui le informazioni sull'offerta sono state trasmesse da un negozio, rivenditore o marketplace esterno. Tieni presente che potrebbero verificarsi temporanee discrepanze di prezzo a causa di possibili ritardi nella trasmissione dei dati.
Fonte
Vinslövs Vapen
Ultima verifica presso il rivenditore
circa 10 ore fa

Descrizione

Nota: L'articolo si trova all'estero. Tieni presente che le condizioni di consegna, i tempi di spedizione e/o la procedura di acquisto potrebbero variare.
Eemann Tech Aluminium Red Dot Mount for 1911/2011 Bomar-Cut SlidesEngineered for precision and reliability, the Eemann Tech Red Dot Mount offers a solid, lightweight mounting solution for red dot optics on 1911/2011 pistols with Bomar-cut slides. Constructed from robust 7075 T6 aluminum and weighing just 15 g, it maintains perfect alignment under demanding shooting conditions. Choose between Type V1 and V2 kits, each including all required screws, hex keys, and locator pins for a wide range of red dot models.Specification:Material: Aluminium Alloy 7075 T6Weight: 15 gColor: BlackFits: Bomar-cut 1911/2011 slidesOptional Installation Tool: ET-130010 (sold separately)Type V1 – ET-111901 Includes:Red Dot Mount – V1 (1 pc.)Hex Socket Set Screws – ET-131008 (2 pcs.)Hex Key 2 mm L-shape – ET-030013 (1 pc.)Locator Pins:V1C – ET-130881 (2 pcs.)V1A – ET-130882 (2 pcs.)V1E – ET-130883 (2 pcs.)Spare Screws & Lock Washers:For Vortex Venom – ET-130888 (2 pcs.)T15 Screws for Vector Optics – ET-130891 (2 pcs.)Compatible With (V1):Vortex Venom & ViperBurris FastFireSIG Romeo 1Vector Optics SCRD-35/40 & TEK footprintsDocter® Sight II PlusShield Sights SMS/RMSType V2 – ET-111902 Includes:Red Dot Mount – V2 (1 pc.)Locator Pins:V2B – ET-130884 (2 pcs.)V2D – ET-130885 (2 pcs.)V2F – ET-130886 (2 pcs.)Hex Keys:1.5 mm L-shape – ET-030012 (1 pc.)3 mm L-shape – ET-030015 (1 pc.)Hex Socket Slide Lock Screws – ET-130887 (2 pcs.)Spare Screws:M4×10 – ET-130890 (2 pcs.)M4×12 – ET-130892 (2 pcs.)T15 Screws for Holosun – ET-130891 (2 pcs.)Compatible With (V2):C-More RTS2/STS2/RTS3Benthley TSX6 & MOJ footprintsVortex RazorSIG Sauer Romeo 3Trijicon RMRKahles Helia RD 20018/20019Holosun HS507C/HS507Comp/HE508T/HS407CVector Optics SCRD-36/37/59Installation InstructionsPrepare & Safety:Clean work area, wear safety glasses and gloves.Keep a parts tray to avoid losing small screws or pins.Unload & Inspect:Remove magazine and rack slide back.Visually & physically inspect chamber—confirm no round is present.Disassemble Slide:Lock slide open, push out slide-stop lever.Remove slide assembly from frame.Remove guide rod, recoil spring, and barrel.Remove Factory Rear Sight:Secure slide in padded vise.Use a dovetail sight pusher aligned to the rear sight wings.Apply even pressure until sight slides out.Mount Red Dot Base:Note directional arrow on mount base—align toward muzzle.Place mount into Bomar-cut dovetail at slight rearward angle.Use ET-130010 installation tool or brass punch to tap gently.Seat fully until flush, checking alignment from above.Insert Locator Pins:Select pins matching your red dot footprint.Press pins into mount’s pin holes until they click flush.Attach Red Dot Optic:Place optic on mount, aligning holes to pins.Insert manufacturer screws—start each by hand.Tighten in criss-cross pattern to 6-10 in-lb torque (check your optic’s spec).Apply medium-strength thread locker to threads before final torque.Reassemble & Function Check:Reinstall barrel, spring, and guide rod.Reattach slide to frame; cycle action to ensure smooth operation.Zero Your Optic:At 10 yds begin with bore light or bore sighting to get on paper.Fire group of three, adjust windage/elevation per click value.Confirm at your preferred zero distance (e.g., 25 yds).Record settings for future reference.

Offerte simili